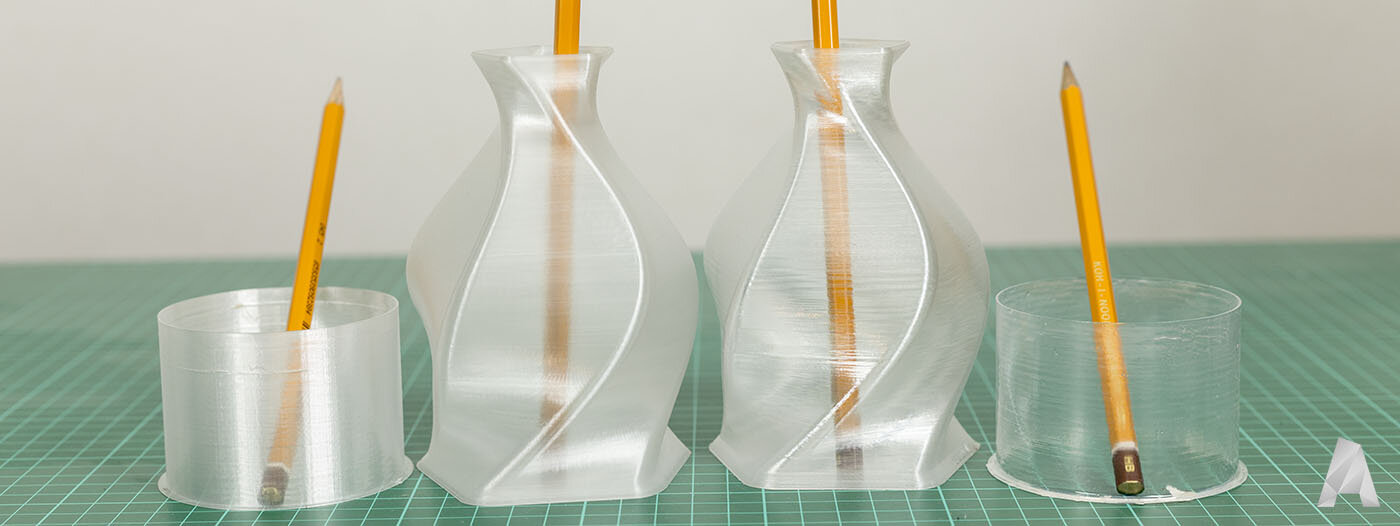
Transparent 3D Prints with Colorfabb XT
This guide shows you a few ways of getting transparent 3D prints with Colorfabb XT as our filament of choice!
Colorfabb XT is a great base material to start with for your transparent 3d prints, but other clear and transparent filaments also work good as a starting point.
The specific reflection index of the Colorfabb XT makes these examples extra effective.
What you need for transparent 3D prints
We’re going to use two methods to get transparent 3d prints. The first one being XTC-3D, a Formulated Epoxy Resin product from SmoothOn I’ve used before in this article.
The second less expensive (but also less effective) product is a “generic” transparent acrylic spray coating. This works best for coating the insides of vases and products.
To make it easier for you i’ve collected the products I recommend:
Foam Brush (20-pack) These are “use once” due to the epoxy.
Acrylic spray coating (there’s many versions, some local)
There’s a few other optional supplies you might want if you don’t have a workshop at home. I’ll list those further down.
How to prepare transparent 3D prints in software.
For best results when using Colorfabb XT you want to set a few settings in your 3D printers slicers to have a good start.
For example, Colorfabb XT recommends 240-260C printing temperature and 40-70 mm/s printing speed. I would say go high on temperature and slow on speed to maximize the finish, continuity and transparency on your model.
Using “Vase mode” will also help a lot since that gives you the thinnest possible walls. This won’t work for all models of course.
I’d recommend using 0,4mm nozzle and not smaller since the vase mode will make the print a bit weak. Thicker nozzle sizes should not be a problem, just make sure you slow down even more.

What affects the transparency of the model
You need to access the surfaces (both inside and outside) of your model for best possible transparency. Therefor a “Vase mode” is the best option to use for your models.
If your model closes of it’s volume (like this vase-mode-rocket from gCreate) you would be best splitting it in halv so you can access the inside of the print and spray/coat the inside before gluing it together again.
If you model can’t be accessed (or split) on the inside and you still want transparency for some reason (like LEDS), you could try printing with thick walls, but no infill at a very slow speed.
To create a void if your model can’t print with vase mode you can use mesh mixer to create a cylinder och box inside the modell to create the empty volume.
The reason to choose spray coating
The only real reason why I include the coating is the have a way of coating insides of models with a narrow opening, like the Twisted Pentagon Vase from Tackoum.
With the Spray, it’s easier to over-saturate the inside of the vase and coat the inside by rolling the vase around, something that would be very hard to coat with XTC-3D.
Why XTC-3D gives the best transparency on Colorfabb XT
Thanks to the epoxy(ish) material of the XTC-3D, it ends up having almost the same reflective index as Colorfabb XT.
This helps keeping the light going through the model more like a regular window, compared to a frosted glass, who still let’s light through, but change’s it direction so you can’t see through.
The other benefit of XTC-3D is that the coating fills out the voids between layers caused by 3D Printing. In the illustration you see the layers being squeezed out, creating a rounded edge on both sides of a “vase” print.
The Coating helps fill these out and create a smooth outside (and inside) which then behaves like one physical model that transfer the light more equal. It’s like putting water on both sides of a frosted glass, it will be much more transparent!
The results from different applications
To visually help you understand how the different coatings behave I made a few versions and experiments using the clear coating, XTC-3D and Colorfabb.
The GIF above shows how the XTC-3D really fills out the layers on the Colorfabb XT print, while the spray does the same job less effective.
Below you’ll see a range of different closeups. Click the image to see larger resolution.
Colorfabb XT transparent 3D print control (no coating)
Single Spray Coating
Dual Spray Coating
Single XTC-3D Coating
Dual XTC-3D Coating
Now you’re ready to make your own transparent 3D prints!
That’s all you really need to know to get going. Now start 3D Printing and please let me know if you’re doing any cool prints in Colorfabb XT or other materials!
XTC-3D Also work as a great coating on non-transparent 3D prints as it fills the voids and creates a “clear coating” that hides layer lines.
Feel free to tweet me or comment on this article if you have any questions of the process or if you just want to show of your own prints!
Affiliate links below! so you can support 3D Print Tech Design while getting started with transparent 3D prints. Here’s also a few other additional optional items that might help for anyone who want to create transparent 3d prints at home.


