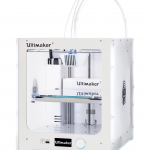
Ultimaker 3 3D Printer Review
The Dual Extruder Ultimaker got here!
The Ultimaker 3 3D Printer hit the market promising a lot of new features and a whole new focus for Ultimaker. This review focuses on whats new, how it works and who it’s for. Maybe it’s for you? Try out the video above and come back here in a few minutes.
If you just want to see the conclusion, it starts at 24:24
Extra HiRes images from the review
To make sure you see the details for the new Ultimaker 3 3D Printer, I took some hi-res photos that I wanted to share with you as well so can get a better view. These are from the different prints featured in the movie.
Additional comments
There are just some things that are hard to incorporate into the video and is really more of extended though and explanation of what I did export to the video. A few of those things are mentioned below and it would help a lot to have your feedback on both the video, the printer and my content!
Thoughts on Cura slicer
As you probably noticed (and maybe got boored watching) I was really on and on about how the new Cura worked. I think it’s really one of the biggest parts of the new Ultimaker experience that is launched with Ultimaker 3.
The hardware is superb and Ultimaker now focus on features that allows less experienced users and at the same time more complicated applications. What binds the new main area of focus together is of course the software.
Update; Since the release of Ultimaker 3 there’s been a lot of interesting updates in Cura which you can read more about here.
What can you do to improve support materials?
Cura slicer is awesome, but a few of the settings are hidden by default. Settings I find quite important to get good dual extrusion and PVA support 3D printing done smoothly.
I’d recommend you to toggle these settings and use them when possible.
Specially when it comes to Support material, there are things to change if you have a good eye of judging the complexity of the design you are printing. These functions helped me a lot to improve print speed in general when using PVA support material:
Support Overhang Angle – Can be adjusted for quicker prints
Support Density – Adjust to lower if you are brave (it’s support up to “dense support”)
Support Interface Thickness (The 100% amount of support that has contact with ur model)
This is at 1mm in standard, which can be around 5-10 layers depending on your settings. I’d set it to max 3 layers for faster prints!
Prime Tower Size – Change this from 15mm to 10mm if you have a print under 100mm tall
Helps with overall speed.
Play around with settings for best learning
Remember to play around with the settings a bit and sett your estimated print time. It can work wonders if you’re just doing it right. But don’t expect to save more than 1/3 (which is still good) of your print time, otherwise it will probably be too much compromises.
I’ve heard good things about Cura 2.4 that enables you to get some faster results and doing so while maintaining the quality. As you could see, the comparison on the two #3Dbenchy models showed some result of the PVA being reduced to speed it all up. I believe Cura 2.4 will assist with this, and specially with a better Prime pillar function.
Edit: new Cura versions here.
Store your PVA correctly!
Another really important thing for successful printing with PVA support material in your Ultimaker 3 3D Printer is to store and use the PVA correctly. PVA-spools needs to be dry to function best, both on and outside of the printer.
The 350gram spools shouldn’t last too long (i guess only good thing about being small) but if you don’t use them frequently they will absorb moisture. To prevent this I recommend using a fruit dryer that has adjustable temperatures.
Being able to adjust temperatures really help when you dry other filament as well. I’ve made this article on how and why materials are damaged by moisture.
Here’s the products you’ll need:


